

When a Canvas quiz has a limited number of attempts and an availability date, there are two sets of actions instructors usually need to take to provide a student with an additional attempt or extension on the quiz. First, the instructor will need to add a new quiz attempt for the student. Second, if the availability date has passed or is about to pass, they will need to extend the availability of the quiz. This short guide will walk you through both stages of the process.
Please note that this guide does not address due dates, which do not typically interfere with quiz moderation. For more on due dates, see the Envision piece Offering Extensions in Canvas. If you are interested in the relationship between due dates and availability dates, see the Canvas guide to due dates and availability dates.
Stage 1: Adding a Quiz Attempt
Depending on your situation, you can add a new quiz attempt for all students or just one or a few.
Adding a Quiz Attempt for All Students
To add a new quiz attempt for all students, you’ll need to access the quiz settings. The view of quiz settings will differ depending on whether your course is using Classic or New Quizzes.
In Classic Quizzes
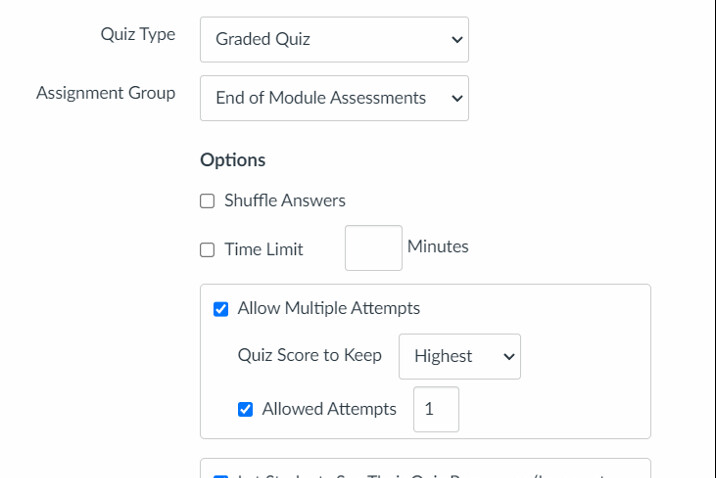
Step 1
Click the title of the quiz, then click the “Edit” button.
Step 2
Scroll down to the Options section. If it is not already checked, check the box next to “Allow Multiple Attempts.”
Step 3
If you’d like to give a specific number of attempts, check the box next to “Allowed Attempts” and enter the total number of attempts you’d like students to have in the “Allowed Attempts” field. If you do not specify how many attempts students should get, they will get an unlimited number of attempts on the quiz.
Step 4
When you are finished, scroll down to click “Save.”
For more information about Classic Quiz settings, see the Canvas guide to Classic Quiz options.
In New Quizzes
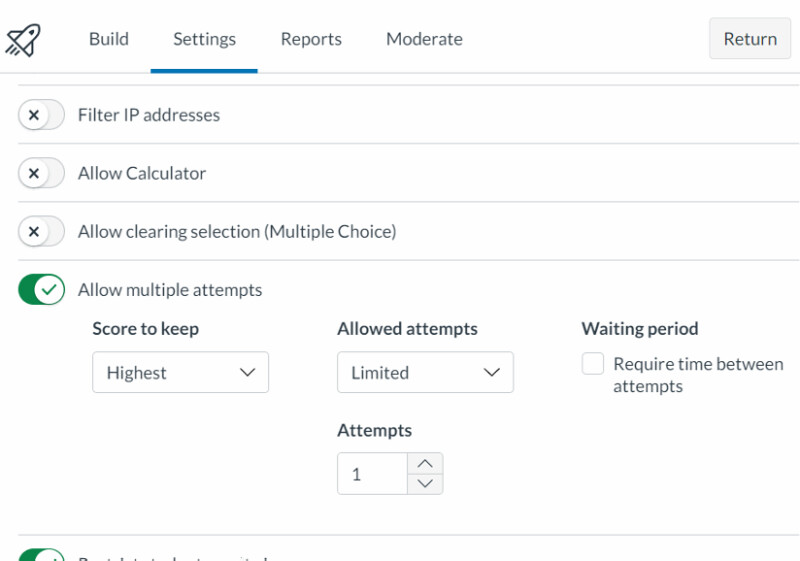
Step 1
Click the three dots to the right side of the quiz title; then click "Build" in the dropdown menu that appears.
Step 2
From there, you’ll click “Settings” in the tabs at the top of the page.
Step 3
Click the slider next to “Allow Multiple Attempts” if it is not already active (green and showing a checkmark).
Step 4
If you’d like to give a specific number of attempts, use the dropdown menu under “Allowed Attempts” to select “Limited” and put the total number of attempts you’d like students to have in the “Attempts” field. Otherwise, students will get an unlimited number of attempts.
Step 5
Click “Return” when you are done.
You may find this guide to New Quiz settings options helpful.
Adding a Quiz Attempt for One or a Few Students
To add additional attempts for one or a few students, you’ll need to access the Moderate page for the quiz. This view differs depending on whether your course is using Classic or New Quizzes.
In Classic Quizzes
Step 1
Click the title of the quiz, then click “Moderate This Quiz.”
Step 2
Locate the student, click the “Edit” pencil icon at the far right of the row, and type the number of additional attempts you’d like to extend into the “Extra Attempts” field.
Step 3
Click “Save” when you are done.
You may find this guide to adding extra Classic Quiz attempts helpful.
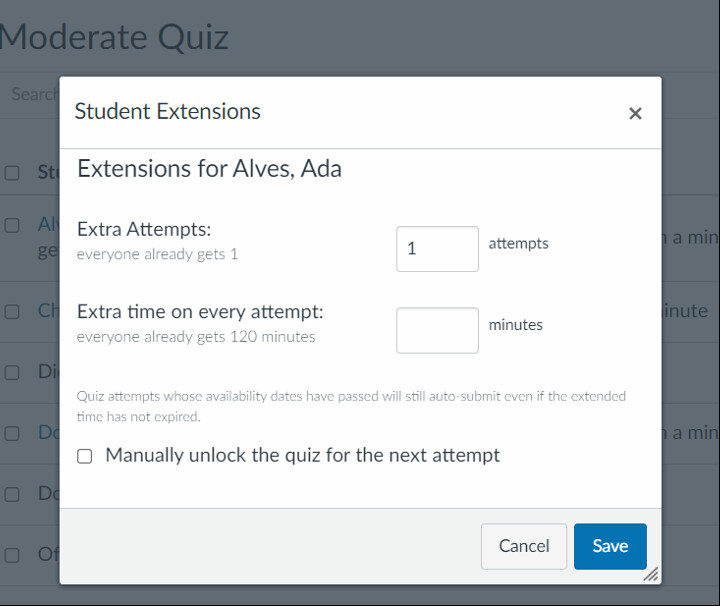
In New Quizzes
Step 1
Click the three dots to the right side of the quiz title, then click "Build" in the menu that appears.
Step 2
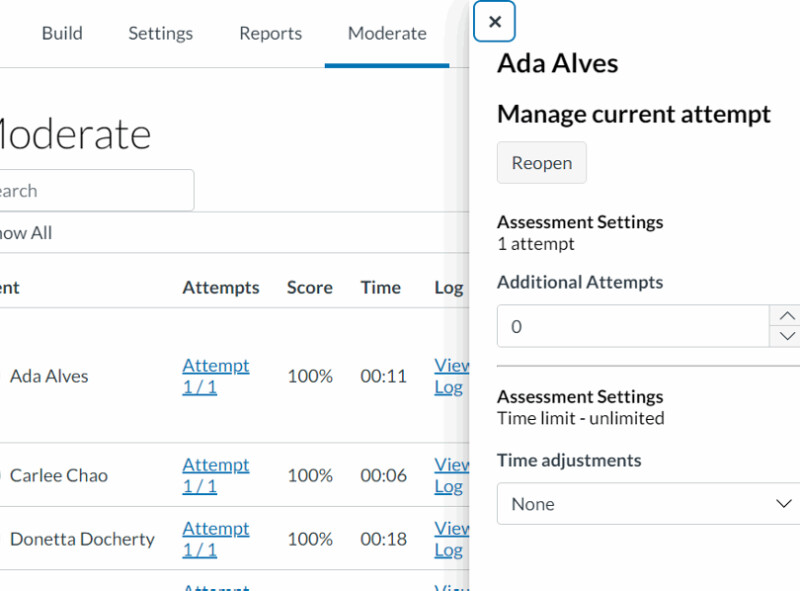
From there, you’ll click “Moderate” in the tabs at the top of the page.
Step 3
Locate the student, click the “Moderate” button at the far right of the row, and type the number of additional attempts you’d like to extend into the “Additional Attempts” field.
Step 4
Close the side tray when you are done.
You may find this guide to moderating a student's New Quiz attempt helpful.
Stage 2: Extending Availability Dates
After adding an attempt, you may also need to extend the availability date of the quiz for the student if that date has passed. Availability dates prevent students from submitting material outside of the established dates. Even if you add an attempt for a student, they will not be able to access that additional attempt if the availability date has passed. When you add an additional attempt on a quiz for a student, we recommend making sure the availability date has not passed. If it has, you can extend the availability date for everyone or for one or a few students by following the steps below.
Extend Availability Date for Everyone
To adjust availability or due dates for all students, you'll access the assignment settings by going to the Quizzes page and clicking the title of the quiz.
Step 1
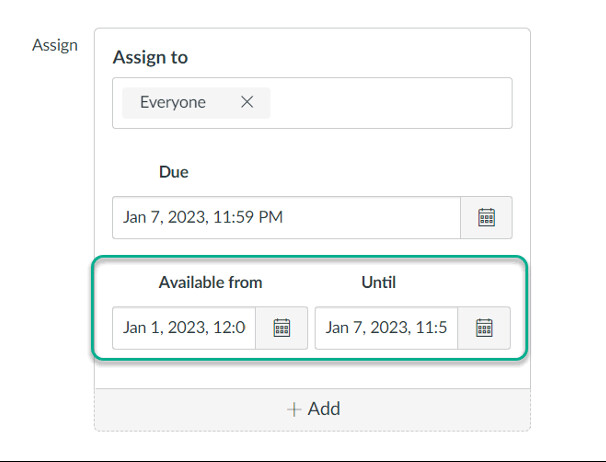
Enter the Edit view for the quiz, and scroll down to the “Assign” section.
Step 2
Adjust the dates in the “Available from” or “Until” field. If you’d like to make the quiz available earlier than currently set, you’ll use the “Available from” field to set an earlier date. If you’d like to make the quiz available later than currently set, you’ll use the “Until” field to set a later date.
Step 3
Click “Save” at the bottom when you are done.
Extend Availability Date for One or a Few Students
To extend an availability date for one student or only some students, you’ll need to add an additional “Assign to” section in the Edit view of the quiz. In essence, this tells Canvas: “I am assigning this task to Student A with these parameters, and I am also assigning this task to all other students in this course with different parameters.”
Step 1
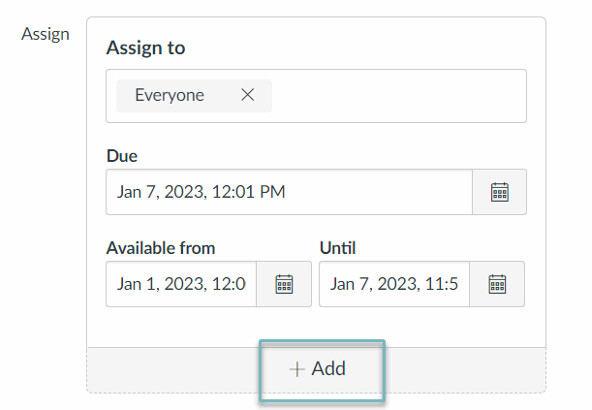
Enter the Edit view for the assignment, and click the “+ Add” button in the “Assign” section near the bottom of that page.
Step 2
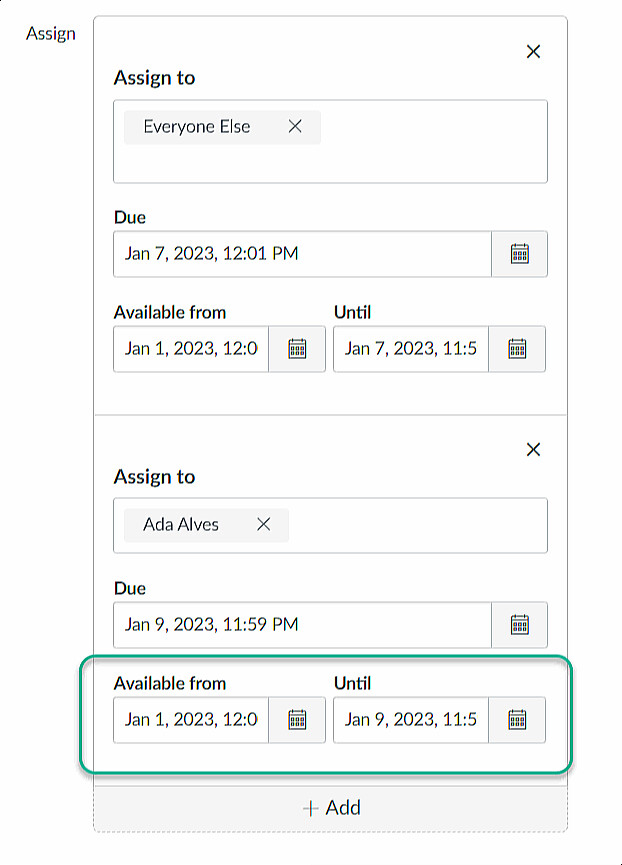
Add the name of the student (or names of multiple students) in the “Assign to” field of the new “Assign” section you have created. Clicking into the field should display a dropdown of sections and students as potential options, but you can also type the name of the student into the field.
Step 3
Set the “Available from” and/or “Until” fields in the new “Assign” section to the extended date you’d like to give.
Step 4
Take a moment to review the page and confirm you have two “Assign to” sections: one for the student (or multiple students) and one for “Everyone Else.”
Step 5
Click “Save” at the bottom when you are done.