

Due dates are a useful pedagogical tool. They help students keep pace to complete the course, populate the To-Do List and Calendar with reminders for both instructors and students, and allow Canvas to work more predictably and efficiently, among other benefits. However, there inevitably come times when a student needs a different time frame than the standard allotment to complete work. This guide will help walk through the considerations needed to extend the due date on an assignment. (Note: Extending the due date of an assignment, discussion, or quiz is different than adding additional attempts at the work. For more information on adding attempts, see the Envision piece Two-Stage Extensions: When a Canvas Quiz Has Limited Attempts and an Availability Date.)
Extend Due Date for Everyone
Extending the due date for all students just requires editing the settings already in place.
Step 1
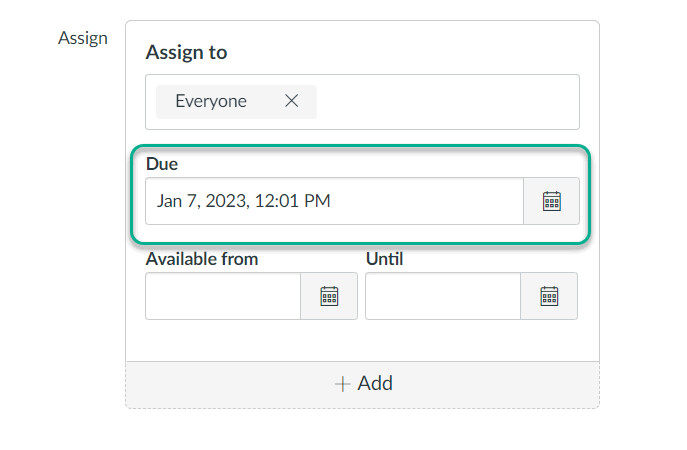
Enter the Edit view for the assignment, and scroll down to the “Assign” section.
Step 2
Type a new due date into the “Due” field, or select a new date by clicking on the calendar on the right-hand side of the field. Make sure the time that populates is set to your preferences or program standards.
Step 3
Click “Save” at the bottom of the Edit page when you are done.
Extend Due Date for One or a Few Students
To extend a due date for one student or only some students, you’ll need to add an additional “Assign to” section in the Edit view. In essence, this tells Canvas: “I am assigning this task to Student A with these parameters, and I am also assigning this task to all other students in this course with different parameters.”
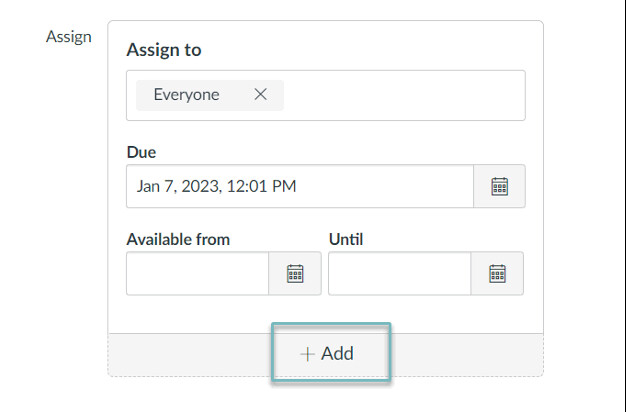
Step 1
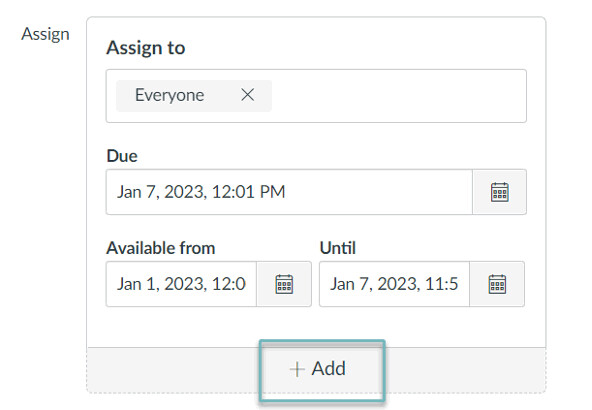
Enter the Edit view for the assignment, and click the “+ Add” button in the “Assign” section near the bottom of that page.
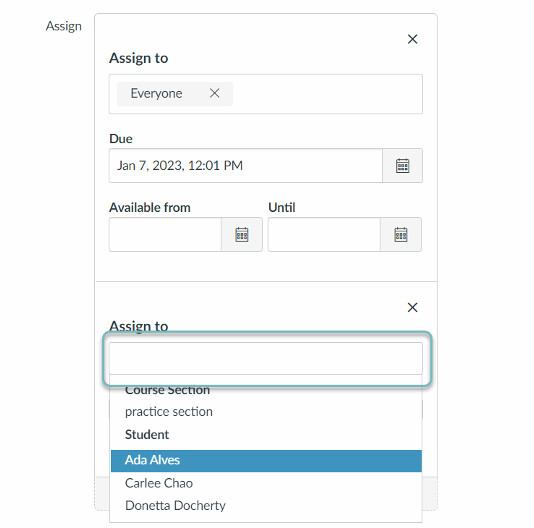
Step 2
Add the name of the student (or names of multiple students) in the “Assign to” field of the new “Assign” section you have created. Clicking into the field should display a dropdown of sections and students as potential options, but you can also type the name of the student into the field.
Step 3
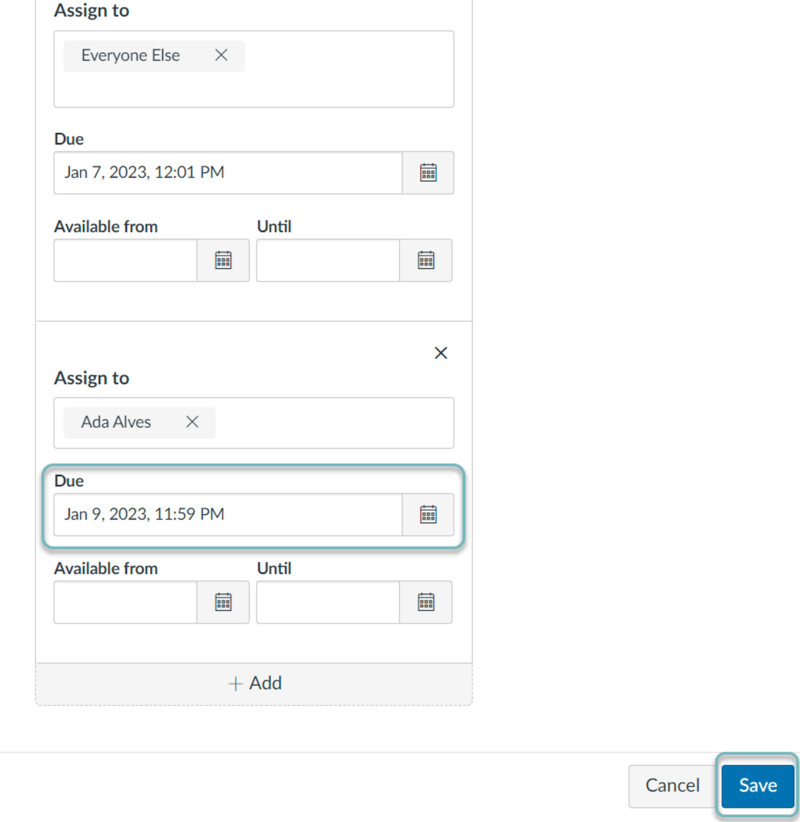
Set the due date in the new “Assign” section to the extended date you’d like to give.
Step 4
Click “Save” at the bottom when you are done.
Extend Availability Date for Everyone
Due dates are distinct from availability dates. While due dates communicate an expectation of timeliness, availability dates prevent students from submitting material outside of the established dates. If you have an availability date set for your assignment, this needs to be shifted to allow students to engage with it. You might think of the distinction as the difference between putting up a sign that says “Please walk on the sidewalk” (a due date) and putting up a barrier that prevents someone from walking anywhere other than the sidewalk (an availability date). We recommend avoiding availability dates when possible, but if you need to adjust existing availability dates, follow the steps below.
Step 1
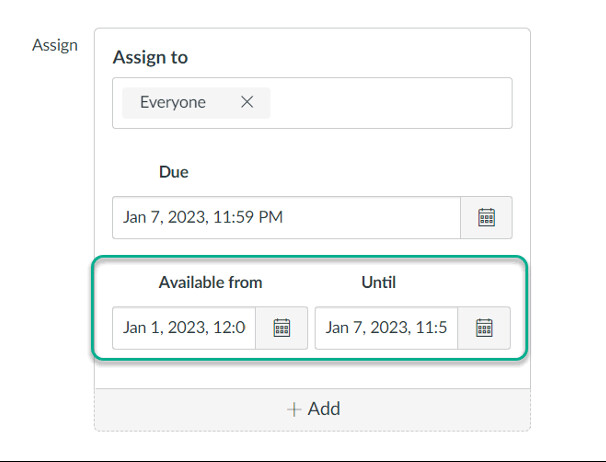
Enter the Edit view for the assignment, and scroll down to the “Assign” section.
Step 2
Adjust the dates in the “Available from” or “Until” field. If you’d like to make the assignment available earlier than currently set, you’ll use the “Available from” field to set an earlier date. If you’d like to make the assignment available later than currently set, you’ll use the “Until” field to set a later date.
Step 3
Click “Save” at the bottom when you are done.
Extend Availability Date for One or a Few Students
To extend an availability date for one student or only some students, you’ll need to add an additional “Assign to” section in the Edit view. In essence, this tells Canvas: “I am assigning this task to Student A with these parameters, and I am also assigning this task to all other students in this course with different parameters.”
Step 1
Enter the Edit view for the assignment, and click the “+ Add” button in the “Assign” section near the bottom of that page.
Step 2
Add the name of the student (or names of multiple students) in the “Assign to” field of the new “Assign” section you have created. Clicking into the field should display a dropdown of sections and students as potential options, but you can also type the name of the student into the field.

Step 3
Set the “Available from” and/or “Until” fields in the new “Assign” section to the extended date you’d like to give.
Step 4
Take a moment to review the page and confirm you have two “Assign to” sections: one for the student (or multiple students) and one for “Everyone Else.”
Step 5
Click “Save” at the bottom when you are done.