

To edit a page in Canvas, simply click on the “Edit” button.

Each page contains a variety of editing tools, similar to those found on most word processing programs. The Rich Content Editor applies the principles of a WYSIWYG editor (What You See Is What You Get) and uses icons to illustrate the functions. You may also hover over an icon to confirm its function.
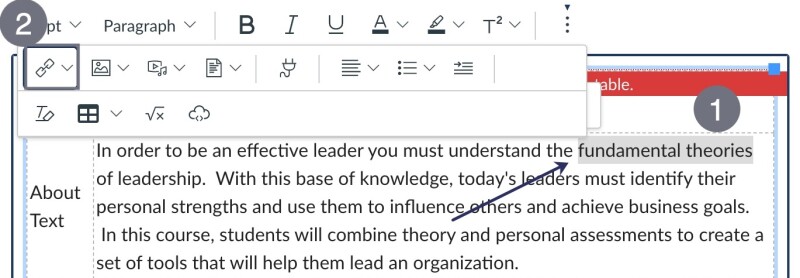
A detailed listing of the icon functionality is outlined in this image.

- Font size and heading and subheadings style
- Text formatting options (in order): bold, italics, underline, text color, background color, and superscript
- Insert/remove links
- Upload/record images or videos
- Text formatting left to right, bullets, and indentation
For a deeper dive, consult the Canvas guide on the Rich Content Editor.
Linking to a Website or File
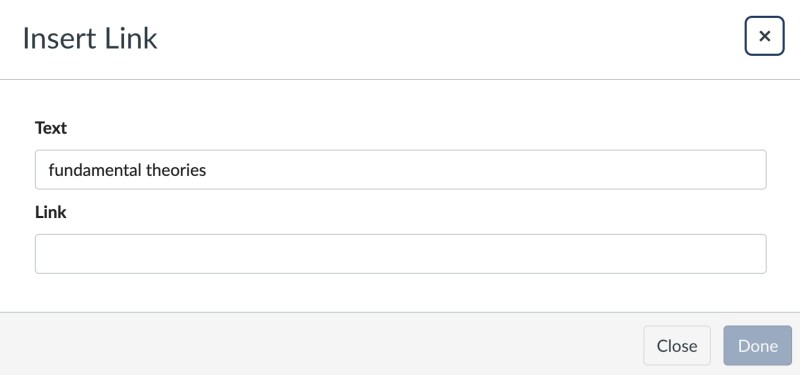
It is often helpful to link directly to a website on a page. To add a link, you will highlight the text and select the link button.
Once you click the link button, you will be asked to enter your link into the dialog box. You may type it in directly or copy/paste the link from another source.
You may also wish to add a link to a course file on the page. To add that link, open the file you wish to add by selecting “Insert” from the menu above the toolbar. Then hover over “Link” and click “Course Links.” Click the dropdown menu on the right side of the screen, which reads “Links,” and select “Files.” You can then select the course file you’d like to add to that page. Don’t forget to click “Save” when you have added the file successfully.
Inserting Images
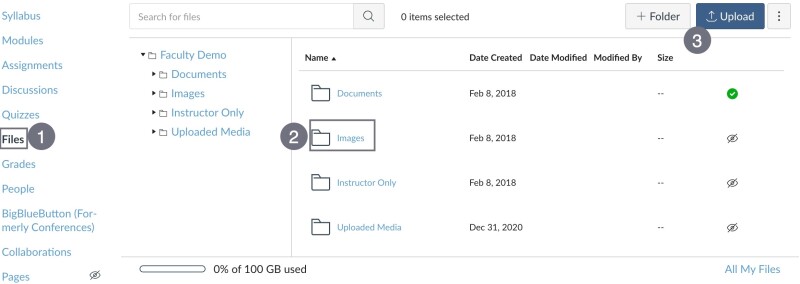
The most reliable way to ensure images are consistently displayed is to first upload them to the course space in Canvas. Do this by selecting “Files” from the navigation (1), then selecting the “Images” folder (2) and clicking the “Upload” button to add the image file. Canvas can display both .jpg and .png files.
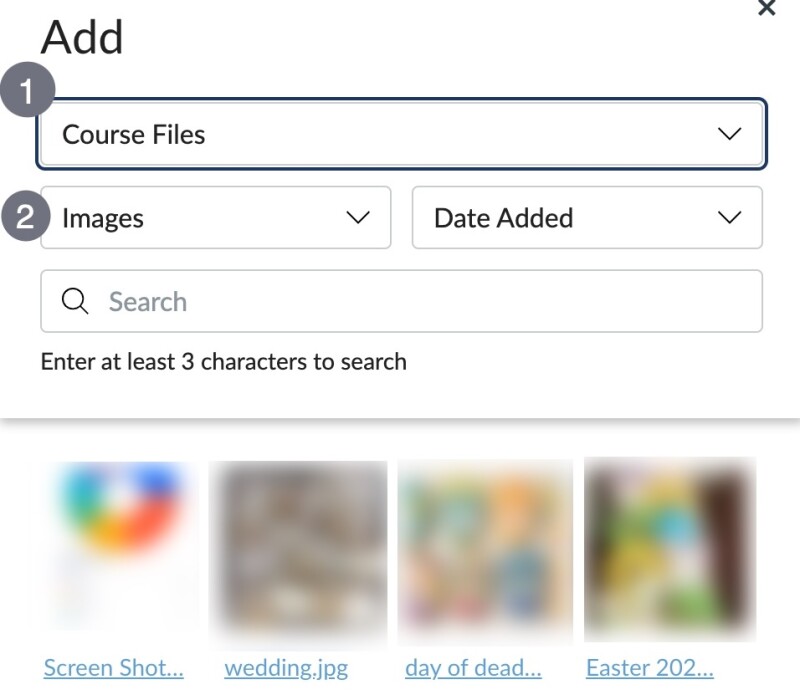
Once your image has been uploaded, repeat the steps above for adding course links, but choose “Images” under course files, as shown in this image.
Editing Tips and Best Practices
- When copying and pasting text from a Microsoft Word document, the formatting from the document may not copy over cleanly into the Canvas page. To avoid this, save your Word doc as a plain text file (.txt), open the file using a text editor program such as Notepad, and copy and paste from there. Once the copy is pasted into Canvas, you can use the WYSIWYG editor to apply formatting. This ensures that the new text matches the size, font, and style of the rest of the content on the page.
- Note that the files tab has three overarching folders: Documents, Images, and Instructor Only. Anything placed in the “Documents” folder will be visible to students who click on the Files tab in the navigation, so make sure sensitive documents such as answer keys are placed in the “Instructor Only” folder.
- Use the preset formats (item 1 in the guide to the Rich Content Editor above) to apply headers to text. This is much faster than manually adjusting the font or font size, and it ensures headers are consistently formatted on each page in the course.
- If you need to update a file in the course, you can save a lot of time by uploading the new version to the same folder in the “files” menu, and then confirming when prompted that you want to replace the old version. This will automatically update any links in the course that pointed to the original file.
- When links are pasted from YouTube, Canvas will embed the video on the page by default. If you’d prefer to just link out to the video on YouTube, check the box marked “Disable inline previews for this link.”
- When updating an existing link in the course, it is easiest to first highlight the linked text and click the icon to remove the old link. Then highlight the text again and click the link icon to paste in the new URL. This ensures that the old link is fully removed from the paragraph.
- When uploading new images, keep in mind that large files may take a few seconds to load on a page. To avoid this, try sizing down the image using a photo editing program before uploading to Canvas.